Category: Roofing contractor

  • What to Do After Hail or Wind Damages Your Roof

    What to Do After Hail or Wind Damages Your Roof

    Dealing with Roof Damage After a Storm

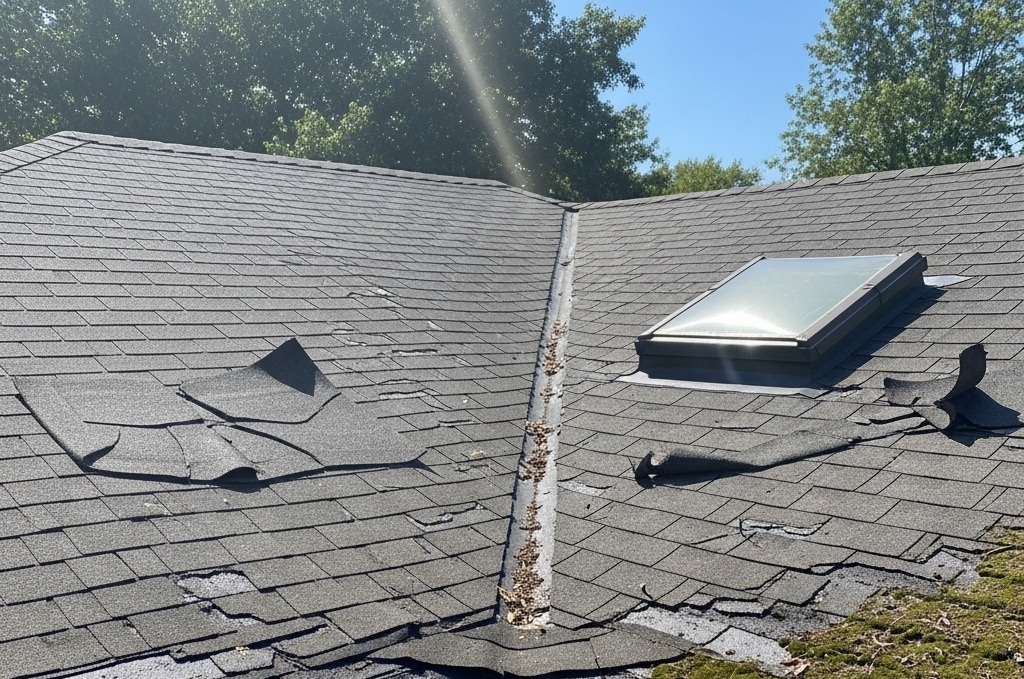
    After an intense storm has ravaged your roof, it can sustain significant damage in a matter of minutes. Hail might cause impact marks or even fractures to the asphalt shingles, while forceful winds can lift, cremate or outright obliterate them entirely. Even without immediate visible evidence, a poorly intact roofing system can facilitate moisture penetration, leading to later-stage issues.

    With recent severe weather, the presence of hail, high winds or other serious conditions, taking the necessary post-storm actions is key to protecting your investment and simplifying the roof repair endeavor. The subsequent, straightforward, step-by-step checklist applies to homeowners in Middle Tennessee:

    1. Make Safety Priority Number One

    Upon return from a powerful storm, prioritize personal safety first, as entering a damaged or water-laden roof is extremely dangerous. Never walk on or over damaged shingles or any unstable area; even something as seemingly innocuous as wet shingles, debris from fallen trees or the compromised nature of roofing materials itself can produce serious hazards.

    The best post-storm approach involves assessing damage from ground level, once conditions are safe enough. Look for clearly visible issues like gaps or removed shingles, unprotected areas of roof, damage to roof valleys or along chimney lines, and any considerable debris left by the storm. If structural damage is evident such as an uneven roofline, a clearly sagging area, severe interior water damage, or power lines threatening to fall to the ground-steer clear and contact a qualified specialist.

    2. Look for Visual Indicators of Roof Damage

    Hail and wind storms can manifest visible impacts in several ways. Both have different potential causes and may lead to any of the signs detailed below; high winds often result in the displacement and often-dislodging of shingles, while hail strikes can result in bruise marks, cracks and even missing granules on shingles.

    Here are just a few common signs to watch for from the ground: Missing, dislodged or split shingles / Creased, torn or even cracked shingles / Dent-like hail impact marks / A high number of granules littered around the property after the storm / Shingles that have broken at their valleys/where two roof planes meet / Roof vents being dislodged or damaged / Anything that’s fallen onto the roof as a result of the wind.

    Many times, problems are unseen and a professional will need to access and analyze them. TCS Roofing offers free, thorough storm inspections to homeowners, at no obligation whatsoever to you.

    3. Photograph Each Visible Mark of Damage

    As soon as safely possible, snap photos or take video recordings of the property if any part of the roof itself has been damaged. Photograph fallen tree debris, any interior water damage seen on ceilings or interior walls, and other damage, such as exposed decking and any missing or damaged shingles or valley damage.

    Aim to get close-up and far-away photos showing the severity, as well as the general appearance of the entire home structure. You will also want to include the date and exact location of each item and maintain a record of where temporary repairs may have been implemented. This visual evidence is important when dealing with your insurance agent and roofer alike.

    4. Protect Your Home From Further Water Intrusion

    Should a storm create even the slightest breach in the roof system, any new rainfall will naturally exacerbate the damage. The water can seep between shingles, reaching the underlying insulation, home decking, interior walls and more.

    If there are signs of active water damage or leaking within your home, move out any valuable furnishings or property from beneath the drip and place buckets, bowls, or trash cans directly beneath it. A professional contractor has many ways of effectively temporary-patching your roof until it can be repaired in full or replacement occurs.

    Call emergency services immediately if there is visible damage threatening structural integrity and the experts will assess its condition and implement needed protective measures. TCS Roofing Company’s storm-response teams can secure your home with either simple temporary repairs or full storm-related renovations.

    5. Have a Professional Inspect Your Roof

    Often, hail can weaken shingles on an inconspicuous part of the roof and can actually damage other more vulnerable elements, though no symptoms may seem evident at ground level. A professional inspection not only assesses what can be seen but also what isn’t immediately obvious, taking into account wind and impact damage factors, flashing, vulnerable sections of the roof, and everything else on the entire roof area.

    As stated, a TCS Roofing specialist can and will offer a free inspection of your home, analyze the cause of damage, prepare a no-obligation bid and upon approval, complete the necessary repair, then conduct a follow up inspection. Knowing what is actually causing the roof damage, rather than guessing will ensure it doesn’t recur and can help you decide between smaller repair jobs or total roof replacement.

    6. Notify Your Insurance Provider

    For homeowners where a severe storm has done significant damage to the home’s roofing system, contact the insurance company and explain the damage along with inquiring about what the insurance policy covers and how claims are processed. Keep records of all necessary documentation which would include photographs of any damage observed from the ground along with the reports from any inspections performed on site. Photos of water damage on the interior and exterior of the home should also be considered in the documentation.

    Your roofer can and may prepare an estimate, providing detailed descriptions, but your policy dictates exactly what’s covered, so speak with your insurance carrier to confirm details and requirements specific to your individual policy.

    7. Don’t Put Off Small Repairs

    Don’t procrastinate or discount small roof-related issues – something as minor as broken or popped shingles are problematic when left unattended. They’ll enable water to permeate underlying structural support for your shingles, leading to larger repair costs such as rot and deterioration of home decking.

    TCS Roofing Company repairs leaking roofs, fallen shingles, wind/hail damage and other roof work affecting asphalt shingles all throughout Middle Tennessee.

    Watch Now: Protect Your Home with Expert Asphalt Shingle Roofing

    Contact TCS Roofing Today

    Storm damage, no matter how seemingly minimal, can bring many stressful inconveniences. By following these crucial steps after a storm, your home will be protected and you’ll be better equipped to handle the roof repair process.

    Get professional storm and hail damage roofing services you can rely on to assist you with: wind and hail damage repairs, emergency repairs for the storm, overall professional repairs, roof inspections, and re-roofing for residential and commercial property needs throughout the greater Middle Tennessee region. Our complimentary, no-obligation roof inspections are where your path to storm damage repair-from finding out the problem to scheduling repairs-begins.

    Was your roof hit with hail or high winds this season? Don’t wait, a simple repair now may save you costly replacement down the road!

    Call the roof repair and inspection experts at TCS Roofing today.

    Contact us: (615) 997-4276 Website: https://tcsroofer.com/

  • Choosing a Contractor: 7 Red Flags to Watch Out for When Hiring a Roofer in TN

    Choosing a Contractor: 7 Red Flags to Watch Out for When Hiring a Roofer in TN

    Hiring a reliable roofer in Tennessee is crucial for protecting your home from the state’s humid summers, severe storms, and occasional tornadoes. Spotting red flags early can save you from costly repairs, legal headaches, and shoddy work.

    Tennessee’s diverse climate—from Nashville’s hot, humid summers to East Tennessee’s heavy rains—puts roofs under constant stress, making quality roofing essential. Poor choices can lead to leaks, structural damage, or even safety hazards. This guide outlines seven key red flags when hiring a roofing contractor in TN, drawing from common industry pitfalls. By avoiding these, you’ll safeguard your investment and ensure lasting protection.

    Red Flag 1: No License or Insurance

    In Tennessee, roofers must hold a contractor’s license from the Tennessee Board for Licensing Contractors if their projects exceed $25,000 in value or $3,000 in labor costs. Demand proof of a valid license and certificates for general liability insurance plus workers’ compensation. Unlicensed or uninsured roofers leave you liable for worker injuries, property damage, or code violations—potentially costing tens of thousands in fines or lawsuits. Always verify via the TN Department of Commerce & Insurance website.

    Red Flag 2: Storm-Chasing Out-of-Towners

    After storms like those from Hurricane Helene remnants, “storm chasers” flood TN from out of state, promising quick fixes with flashy trucks. They often use fake local addresses, lack proper insurance, and vanish post-job, voiding warranties. Local TN roofers invest in the community, offer follow-up service, and understand state-specific codes like wind uplift requirements in Middle Tennessee. Check for a physical TN business address and reviews from local jobs.

    Red Flag 3: Unrealistically Low Bids

    A bid far below competitors often signals cheap materials, skipped steps like underlayment or ventilation, or unlicensed subcontractors. In TN, quality asphalt shingles meeting ASTM standards cost a premium, and low bids ignore disposal fees or permits required in counties like Shelby or Knox. Compare line-item breakdowns: legitimate quotes detail materials (e.g., GAF Timberline HDZ), labor, and timeline. Hidden corners cut lead to premature leaks in TN’s freeze-thaw cycles.

    Red Flag 4: High-Pressure Sales Tactics

    Beware roofers demanding immediate signatures with “today-only deals” or scare tactics about “imminent collapse.” Ethical TN contractors give you time to review, consult references, and get multiple bids. Pressure ignores your right to a cooling-off period under TN consumer laws. They may push unnecessary full replacements over repairs, inflating costs without addressing root issues like poor attic ventilation common in Chattanooga homes.

    Red Flag 5: Vague or Verbal Contracts

    Insist on a detailed written contract specifying scope (e.g., tear-off depth, flashing around vents), materials brands, payment milestones (never full upfront), warranties, and cleanup. Verbal deals or one-page “estimates” invite disputes. TN law requires contracts for jobs over $25 to protect against “bait-and-switch” where low initial quotes balloon with “surprise” fees. Review for liens waivers to prevent subcontractor claims on your property.

    Red Flag 6: Poor References or Online Presence

    Legitimate roofers provide 3-5 recent TN references and have established websites, Google reviews, and BBB profiles. Dig for photos of completed jobs in your area, like Memphis brick homes or Knoxville asphalt roofs. Fake reviews or no digital footprint signal fly-by-nights. Check Angi or HomeAdvisor for TN-specific ratings—avoid those with patterns of unresolved complaints about leaks or delays.

    Red Flag 7: Subpar Workmanship Indicators

    During inspections, watch for crooked shingles, exposed nails, inadequate flashing, or skipped ice-and-water shields required for TN’s winter ice dams. Post-job, verify permits pulled (mandatory in urban areas like Franklin) and no debris left behind. Shoddy crews hire unskilled labor, ignoring IRC codes for roof pitches over 3:12. Request a final walkthrough and manufacturer certifications for warranties like Owens Corning’s 50-year system.

    Tennessee-Specific Tips

    TN’s building codes emphasize hurricane-rated products in West TN and metal reinforcements in the Smokies. Use the TN Secretary of State’s business search for legitimacy. Post-job, file insurance claims only with licensed pros to avoid denials. Budget $8,000-$20,000 for a 2,000 sq ft asphalt roof replacement, factoring local labor rates around $100/hour.

    Read more:

    Commercial Roofing Contractor in Middle Tennessee | Top 5 Myths About Roof Replacements

    Summary

    Steer clear of unlicensed operators, lowballers, chasers, pressure sales, vague contracts, weak references, and sloppy signs to hire a trustworthy TN roofer. Verify credentials, get written details, and prioritize locals for peace of mind. Your roof’s longevity depends on it—invest wisely to weather TN’s elements.

  • Top 5 Myths About Roof Replacements

    Top 5 Myths About Roof Replacements

    Roof replacements are a major concern for Tennessee homeowners facing humid summers, severe storms, and occasional ice. This blog debunks the top 5 myths, with #3 often surprising residents who underestimate local weather impacts.

    Myth 1: New Roofs Never Need Maintenance

    Many Tennessee homeowners believe a fresh roof is maintenance-free for decades. In reality, Nashville’s mix of heat, humidity, and debris from oak trees demands annual checks to clear gutters and spot early wear. Skipping this shortens lifespan and invites hidden damage like mold under shingles.

    Myth 2: Leaks Always Mean Full Replacement

    A drip in your attic doesn’t automatically signal a total tear-off, contrary to popular belief. Most leaks in Tennessee homes stem from loose flashing or cracked shingles, fixable with targeted repairs that save thousands. Professional inspections reveal if it’s a simple patch or deeper issue, preventing water from rotting rafters.

    Myth 3: All Roofing Materials Perform Equally

    This myth shocks many, as Tennessee’s climate—think hail in spring and 90°F humidity—exposes how asphalt shingles outperform metal or tile in cost and durability here. Cheaper imports fail faster against wind-driven rain, while local codes favor impact-resistant options for storm insurance discounts. Choosing wrong leads to frequent claims after events like 2025’s tornado outbreaks.

    Myth 4: You Can Layer a New Roof Over the Old One

    Overlaying saves time upfront, but Tennessee building codes often prohibit it due to added weight straining older structures. Two layers trap moisture, accelerating rot in our wet falls and boosting future costs. Full removal ensures proper ventilation, essential for roofs under 15 years old.

    Myth 5: Roof Replacement Is Always Too Expensive

    Homeowners dread quotes, assuming $15,000+ for a 2,000 sq ft Tennessee roof. Yet factors like material choice and storm incentives cut averages to $8,000–$12,000, with insurance covering much post-hail. Energy-efficient upgrades qualify for rebates, and proactive swaps avoid pricier emergencies.

    Tennessee’s roofs endure more than most, from Nashville’s music-row downpours to Knoxville’s Appalachian winds. Busting these myths empowers smarter decisions.

    TCS Roofing Company stands out as a trusted local Contractor in Tennessee for roof replacements, serving areas from Nashville to Knoxville with over 20 years of experience. Specializing in storm-damaged repairs and full installations, they use high-quality, impact-resistant materials suited to Tennessee’s harsh weather, ensuring compliance with state codes and offering competitive warranties. Homeowners praise their quick insurance claim assistance and transparent pricing, making them a go-to for debunking myths through expert consultations that prevent costly mistakes.

    Watch Now: After Storm & Hail Damage Roofing Services in Middle Tennessee

  • Signs of a Leak: How to Spot Roof Damage Before It Destroys Your Ceiling.

    Signs of a Leak: How to Spot Roof Damage Before It Destroys Your Ceiling.

    Imagine this: You’re enjoying a quiet evening at home when you hear a faint drip-drip-drip from the ceiling. Water stains spread like ink on paper, and suddenly, your living room is a soggy mess. Roof leaks don’t announce themselves with fanfare—they sneak up, turning minor issues into costly disasters. In fact, according to the Insurance Information Institute, water damage from roof leaks causes billions in claims annually in the U.S. alone, and similar trends hold in regions like India where monsoons exacerbate the problem.

    The good news? Most leaks stem from preventable roof damage, and spotting signs early can save you thousands in repairs. Whether you have asphalt shingles, tiles, or a metal roof, vigilance is key. In this post, we’ll break down the top warning signs, from visible clues to subtle indoor hints, so you can act before your ceiling caves in. Let’s dive in and arm you with the knowledge to protect your home.

    Understanding Common Roof Vulnerabilities

    Roofs endure relentless abuse from weather, UV rays, debris, and time. Asphalt shingles, popular in many homes, last 20-30 years but crack under extreme heat or hail.  

    Key culprits include:

    Aging materials: Shingles curl, crack, or lose granules after 15-20 years.

    Weather events: Heavy rain, wind, or hail loosens flashing and underlayment.

    Tree proximity: Overhanging branches scrape surfaces and drop debris that traps moisture.

    Poor installation or maintenance: Gaps around vents or chimneys invite water.

    Regular inspections—twice yearly and after storms—reveal issues before they escalate. Climb a ladder (safely!) or hire a pro for a bird’s-eye view.

    Visible Exterior Signs of Trouble

    Start outside; the roof’s surface tells the real story. Walk your property and scan with binoculars if needed.

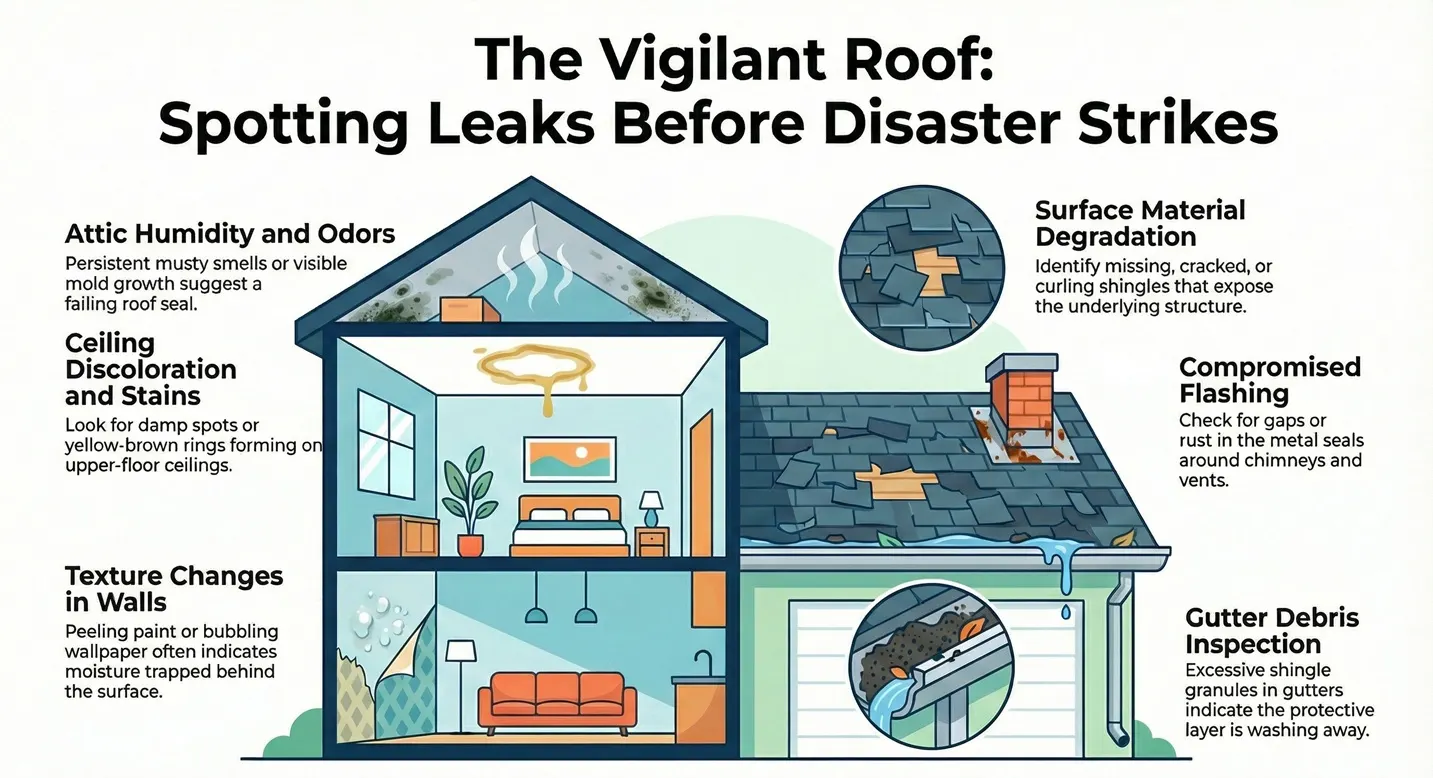
    Missing or damaged shingles/tiles: Look for gaps where wind has ripped pieces away. Missing shingles expose underlayment to rain, leading to rot. Example: After a gusty storm, check eaves and ridges—loose pieces flap like warning flags.

    Granule loss on asphalt shingles: Rub your hand over shingles; black streaks in gutters signal erosion. Granules protect against UV; their loss shortens lifespan by years.

    Cracked or buckling materials: Tiles split from freeze-thaw cycles or heat. Buckled shingles curl upward, creating pools of water.

    Sagging roofline: A dip indicates weakened rafters or trusses, often from prolonged leaks or rot. Don’t ignore this—it’s structural.

    Damaged flashing: Metal seals around chimneys, vents, and skylights. Rust, dents, or gaps here are leak magnets.

    Pro tip: Photograph your roof post-monsoon. Compare seasonally to track changes.

    Subtle Clues from Your Attic and Interior

    Roof issues often hide until they hit indoors. Inspect your attic with a flashlight—wear a mask for insulation dust.

    Water stains on rafters or sheathing: Brown, yellow, or black spots mean past leaks. Even dry stains signal ongoing vulnerability.

    Mold or mildew growth: Musty odors and fuzzy patches thrive in damp wood. In humid climates like Nashville, this spreads fast, risking health issues like respiratory problems.

    Daylight through cracks: Poke a wire through gaps; if light shines from outside, water will follow.

    Indoors, watch for:

    Ceiling stains: Rust-colored rings near lights or fans indicate roof penetration.

    Peeling paint or warped drywall: Moisture lifts finishes before visible puddles form.

    Bubbling or discoloration: Paint bubbles as water seeps from above.

    Catch these early, and a simple patch suffices. Delay, and you’re looking at ceiling replacement.

    Hidden Dangers: Ice Dams, Poor Ventilation, and Pests

    Not all damage is obvious. Ice dams in colder climates (or rare winter snaps in India) form when snow melts and refreezes, forcing water under shingles. Poor attic ventilation traps heat and moisture, accelerating shingle breakdown.

    Pests play a sneaky role too:

    Animal intrusions: Squirrels or birds peck holes; raccoon damage mimics hail.

    Insect infestations: Carpenter ants tunnel into soft, wet wood, worsening rot.

    Test ventilation by feeling for hot spots in the attic during summer. Fans or ridge vents help, but clogged ones fail silently.

    Step-by-Step Inspection Checklist

    Turn knowledge into action with this quick guide:

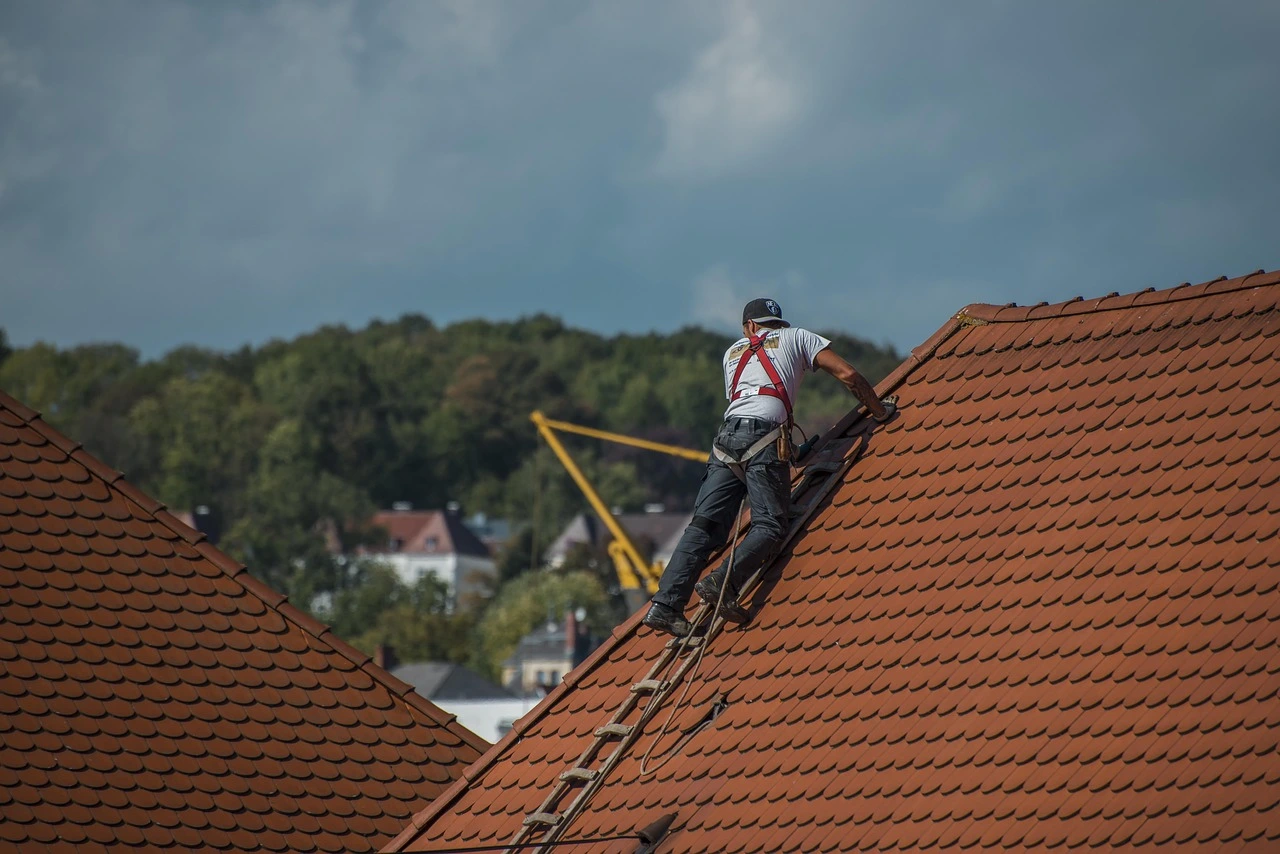
    Safety first: Use stable ladders, work with a buddy, and avoid steep pitches. Hire pros for steep or multi-story roofs.

    Exterior scan (20 minutes): Check shingles, flashing, gutters (clogged = overflow damage), and chimney seals.

    Attic dive (10 minutes): Look for stains, mold, and soft spots. Press wood gently—squishy means rot.

    Interior patrol: Scan ceilings, walls, and around fixtures for anomalies.

    Post-inspection: Clear debris, trim trees, and clean gutters. Schedule pro cleaning annually.

    Tools needed: Binoculars, flashlight, ladder, gloves, camera.  

    If you spot issues, tarp temporarily and call a certified roofer – TCS Roofing Company for repairs.

    Read more:

    Roof Repair Experts in Middle Tennessee | Commercial Roofing Contractor in Middle Tennessee

    When to Call the Pros and Prevention Tips

    DIY works for minor fixes like sealant on cracks, but red flags—sagging, large holes, electrical fizzing—demand experts.  

    Prevent with:

    Annual pro inspections.

    Gutter guards and leaf blowers.

    Quality underlayment during reroofs.

    Weatherproofing flashing with silicone caulk.

    Summary

    Spotting roof damage early hinges on vigilance: Watch for missing shingles, granule loss, stains, mold, and sags. Regular checks—exterior, attic, interior—thwart leaks before they ruin ceilings. Armed with this checklist, you can safeguard your home from water woes. Act now; a dry roof today means peace of mind tomorrow. Share your inspection stories below—what signs have you caught?

  • Is Your Attic Stealing Your Money? How Proper Ventilation Protects Your Asphalt Shingles.

    Is Your Attic Stealing Your Money? How Proper Ventilation Protects Your Asphalt Shingles.

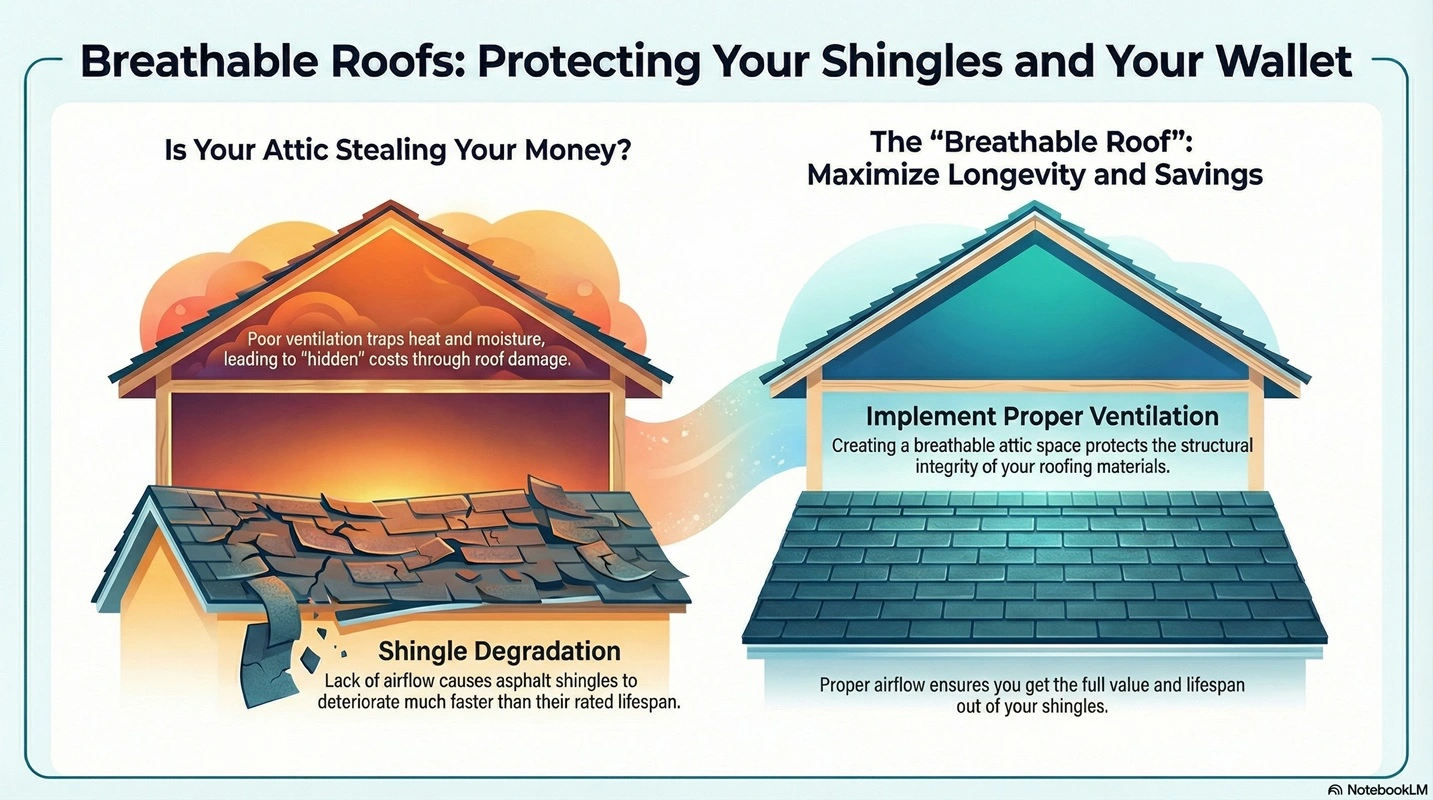
    Picture this: You’re staring at a roofing bill that hits like a gut punch—thousands of dollars to replace your asphalt shingles years ahead of schedule. You wonder, “What went wrong?” Often, the culprit hides in plain sight: your attic. Poor ventilation traps heat and moisture, turning your roof into a pressure cooker that accelerates shingle damage. Asphalt shingles, the most popular roofing material in North America, rely on breathable attics to last their full 20-30 years. Without it, you’re flushing money down the drain on premature repairs.

    In this post, we’ll uncover how attic ventilation works, why it safeguards your shingles (and your wallet), and simple steps to check and fix yours. By the end, you’ll know exactly how to stop your attic from becoming a money pit.

    The Hidden Attic Problem: Heat, Moisture, and Shingle Sabotage

    Your attic isn’t just dead space—it’s the unsung hero (or villain) of your roof’s lifespan. Asphalt shingles endure brutal conditions: UV rays, wind, rain, and temperature swings. But the real killer? Extreme attic heat and trapped moisture.

    In summer, a poorly ventilated attic can hit 150°F (65°C) or more, even if outside temps are a mild 90°F (32°C). This superheats shingles from below, causing them to lose tiny oil-like granules that protect against UV damage. Granules gone means faster cracking, curling, and brittleness—like frying an egg on a scorching sidewalk.

    Winter brings moisture mayhem. Warm household air rises, hits the cold roof deck, and condenses into ice dams or damp rot. This softens shingles, leading to leaks and mold. Studies from the National Roofing Contractors Association (NRCA) show that inadequate ventilation shortens shingle life by 30-50%. Translation: A $10,000 roof replacement arrives five to ten years early, costing you big.

    Example: Homeowner Sarah in Nashville ignored attic vents during a remodel. Two summers later, her 10-year-old shingles buckled under 160°F attic temps. Replacement? $12,000. Proper vents could’ve saved her.

    Why Asphalt Shingles Need Airflow to Thrive

    Asphalt shingles are flexible fighters, composed of fiberglass mats coated in asphalt and topped with mineral granules. They flex with weather but degrade when overheated or wet.

    Proper ventilation creates a continuous airflow path: intake vents low (soffits), exhaust high (ridge or gable). Cool air enters, hot/moist air exits, keeping attic temps within 10-20°F of outside. This “chimney effect” slashes peak heat by 50%, per U.S. Department of Energy data.

    Benefits stack up:

    Extended Lifespan: Vented attics add 10+ years to shingles.

    Energy Savings: Cooler attics mean less AC strain—up to 30% lower bills.

    Fewer Repairs: No ice dams or granule loss reduces leak risks.

    Without it, thermal shock warps shingles. Imagine a credit card left in a hot car: it curls. Same principle.

    Diagnosing Your Attic: Signs It’s Stealing Your Cash

    Don’t wait for shingles to fail. Spot these red flags:

    Shingle Clues: Granules in gutters (like black sand), curling edges, or bald spots.

    Attic Indicators: Temps over 130°F (use an infrared thermometer), musty smells, frost on rafters, or dark streaks on underlayment.

    Energy Bills: Spiking summer cooling costs signal heat buildup.

    Ice Dams: Icicles or roof leaks in winter scream poor airflow.

    Quick test: On a hot day, climb in (safely) with a thermometer. If it’s 40°F+ hotter than outside, ventilation fails. Tools like a hygrometer reveal high humidity (>60%).

    Ventilation Basics: Get the Right Balance

    Experts recommend 1 square foot of vent area per 150 square feet of attic floor space (1:150 ratio), or 1:300 if balanced intake/exhaust. Aim for half low, half high.

    Key Vent Types:

    Vent TypeLocationProsBest For
    Soffit VentsUnder eavesContinuous intakeMost homes
    Ridge VentsRoof peakStrong exhaustPitched roofs
    Gable VentsSide wallsAffordableGable roofs
    Turbine/Box VentsRoof surfacePowered boostLow-pitch roofs
    Solar-PoweredRoof-mountedFree energyEco-conscious

    Pro tip: Baffles (plastic channels) prevent soffit blockages from insulation. Skip cheap plastic combs—opt for durable metal ridge vents.

    DIY Checks and Easy Fixes

    Start simple—no contractor needed yet.

    Inspect Vents: Clear debris from soffits and ridges. Ensure screens block pests.

    Add Baffles: Install foam ones between rafters ($1 each) before insulation.

    Test Airflow: Smoke test—puff a cigarette near soffits; it should pull toward ridge.

    Upgrade Insulation: R-49 minimum in attics fights air leaks.

    Cost? Under $200 for most homes. Example: A Midwest family added ridge venting for $150, dropping attic temps 40°F and saving $300/year on energy.

    When to Call Pros: Big Upgrades That Pay Off

    Severe issues? Hire certified roofers. Full re-venting (new ridge + soffits) runs $1,000-$3,000 but ROI hits in 3-5 years via savings and longevity.

    Bonus: Pair with radiant barriers (foil under rafters) to reflect 97% of heat. Oak Ridge National Lab tests show 20-30% cooler attics.

    Protect Your Investment: Maintenance Calendar

    Spring: Clean gutters/vents.

    Summer: Check temps, trim overhanging trees.

    Fall: Add baffles if needed.

    Winter: Monitor for ice dams.

    Annual pro inspection? $200 well spent.

    Wrapping Up: Ventilate Now, Save Later

    Your attic doesn’t have to steal your money. Proper ventilation is cheap insurance against shingle failure, turning a ticking time bomb into a reliable shield. Asphalt roofs thrive with airflow—ignore it, and pay dearly.

    Take action today: Assess your attic, tweak vents, and watch your roof (and bank account) thank you. A few hours now prevent years of regret.

    Read more:

    Asphalt Shingle Roof Replacement Franklin | Commercial Roofing Contractor in Middle Tennessee

  • How Long Should an Asphalt Shingles Roof Last in Nashville’s Humidity?

    How Long Should an Asphalt Shingles Roof Last in Nashville’s Humidity?

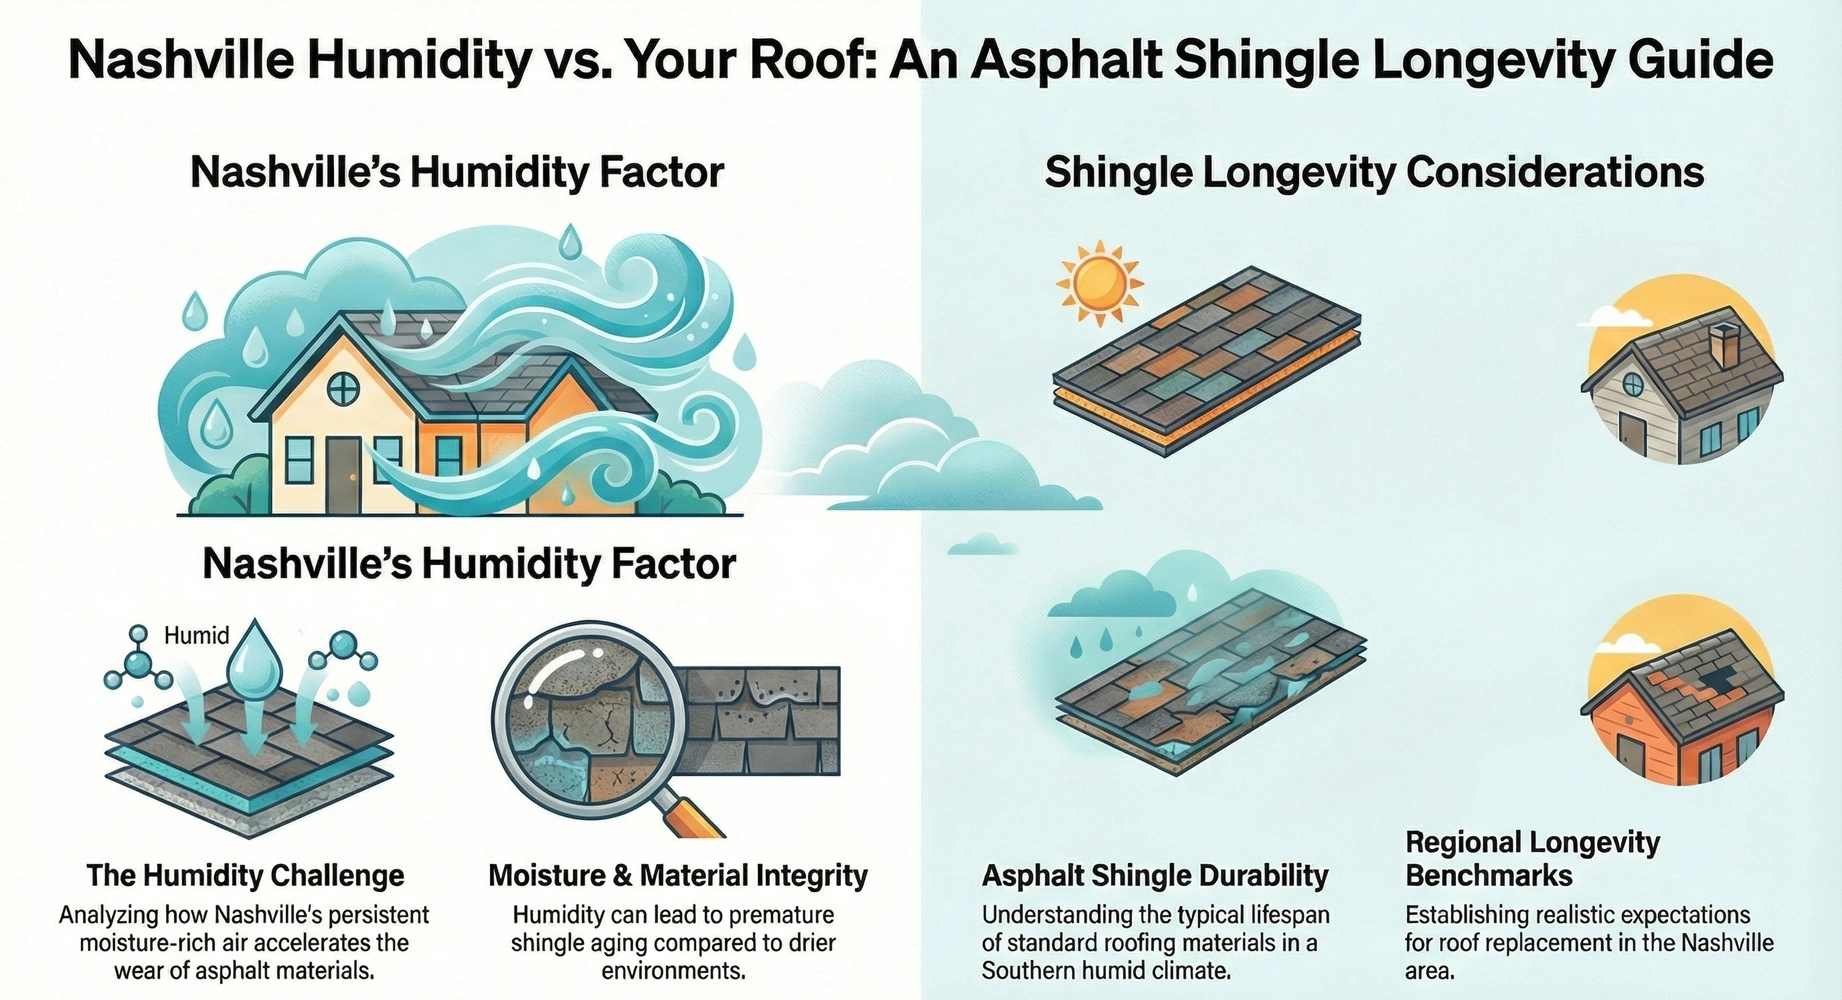
    Asphalt roofs in Nashville’s humid climate typically last 15-25 years, depending on shingle quality and maintenance, as high humidity accelerates mold, algae, and granule loss.

    Nashville’s hot, humid summers and stormy weather challenge asphalt shingle roofs, often shortening their lifespan compared to ideal conditions. While standard asphalt roofs nationwide average 20-30 years, local factors like expansion from heat, contraction in cooler months, and moisture-driven deterioration demand proactive care. Homeowners can maximize durability by choosing higher-quality shingles and staying vigilant.

    Asphalt Shingle Types and Lifespans

    Different asphalt shingles perform variably in Nashville’s humidity.

    Shingle TypeExpected Lifespan in NashvilleKey Traits Affected by Humidity
    3-Tab Asphalt15 years (max 20)Thin, single-layer; prone to rapid algae/mold.
    Architectural20-25 yearsThicker, multi-layer; better resistance but still vulnerable to granule loss.
    Luxury Asphalt30-50 yearsPremium fiberglass; highest humidity tolerance.

    Nashville’s high humidity promotes algae growth, weakening shingles over time, while heat causes cracking.

    Humidity’s Impact on Asphalt Shingle Roofs

    High humidity in Nashville fosters mold and algae, eroding shingle integrity faster than in drier areas. Combined with 90°F+ summers and UV exposure, this leads to drying, curling, and granule loss, potentially reducing lifespans by 20%. Storms add hail and wind damage, necessitating quick repairs.

    Maintenance Tips

    Regular upkeep extends roof life amid humidity challenges.

    Clean gutters twice yearly to prevent moisture buildup.

    Inspect annually for algae, moss, or cracks; treat with antimicrobial washes.

    Trim overhanging trees to reduce shade and debris that trap humidity.

    Ensure proper attic ventilation to minimize internal condensation.

    Quality installation by local pros also matters, as poor work amplifies climate stress.

    Read more:

    Commercial Roofing Contractor in Middle Tennessee | Drone Roof Inspection

    Summary

    In Nashville’s humidity, asphalt roofs last 15-25 years on average, with architectural shingles offering the best balance of cost and durability. Prioritize premium materials, annual inspections, and prompt repairs to push toward the upper end—potentially saving thousands on premature replacements. Consult a certified roofer for a personalized assessment.

  • Why Does Roof Pitch Matter?

    Why Does Roof Pitch Matter?

    Roof pitch, the steepness or slope of a roof, plays a vital role in a home’s functionality, durability, and efficiency. Understanding why it matters helps homeowners and builders make informed choices for long-term performance.

    What Is Roof Pitch?

    Roof pitch measures the vertical rise over a horizontal run, typically expressed as a ratio like 4:12 (4 inches rise per 12 inches run). Steeper pitches, such as 12:12, create a sharp angle, while low-slope roofs might be 2:12 or flatter.

    ​This slope isn’t just aesthetic; it dictates how the roof interacts with weather, materials, and structure. Builders calculate it during design to match local climate and building codes.

    Drainage and Water Management

    Proper drainage is the primary reason roof pitch matters. A steeper pitch allows rainwater and melting snow to flow off quickly, preventing pooling that leads to leaks, rot, and mold.

    In heavy-rain areaslow pitches (under 3:12) risk water accumulation, shortening roof life. Steep roofs shed water 2-3 times faster, reducing underlayment strain and extending material durability.

    Snowy regions mandate minimum pitches (often 4:12+) to avoid collapse from buildup. Flat roofs need extra drainage systems like scuppers, adding cost and maintenance.

    Structural Integrity and Load

    Pitch affects how roofs handle weight from snow, wind, or debris. Steeper designs distribute loads better, using trusses that prevent sagging under heavy precipitation.

    Low-slope roofs bear more constant pressure from pooled water or snow, requiring reinforced decking. In windy zones, moderate pitches (4:12 to 6:12) resist uplift better than very steep ones, where gales hit directly.

    Building codes in snowy U.S. states or northern Europe enforce pitches to ensure safety, avoiding tragedies like roof collapses reported in extreme weather.

    Material Compatibility

    Not all roofing materials suit every pitch. Asphalt shingles need at least 2:12 (ideally 4:12+) for water to shed without seeping under edges.

    Steep roofs support slate, tile, or metal, which rely on gravity and weight for security. Low-slope roofs demand single-ply membranes or TPO, which seal seams better but cost more in installation labor.

    Choosing mismatched materials leads to premature failure; for instance, tiles slip on slopes under 4:12 without special underlayment.

    Pitch RangeSuitable MaterialsKey Considerations
    0:12 – 2:12 (Flat/Low)EPDM, TPO, Modified bitumenNeeds drains; ice dam risk high
    2:12 – 4:12 (Low)Asphalt shingles (with sealant), MetalStarter strips required; slower drainage
    4:12 – 9:12 (Medium)Asphalt, Wood shakes, MetalVersatile; best balance for most homes
    9:12+ (Steep)Tile, Slate, CedarExcellent runoff; requires safety gear for work

    Energy Efficiency and Insulation

    Pitch influences ventilation and insulation space. Pitched roofs create attics for airflow, reducing heat buildup in summer and retaining warmth in winter.

    This cuts energy use by 10-20% via better air circulation, especially with ridge vents on 6:12+ slopes. Low pitches trap heat, raising cooling bills in hot climates.

    Extra loft space allows thicker insulation (R-38+ values), improving efficiency without costly retrofits.

    Aesthetics and Property Value

    Visually, pitch defines architectural style—steep gables suit cottages, while low slopes fit modern flat designs. It enhances curb appeal, potentially boosting resale by 5-10% in style-matching neighborhoods.

    Pitched roofs add usable attic space for storage or conversions, increasing square footage value. In historic areas, matching local pitch preserves character and avoids permit issues.

    Installation and Maintenance Challenges

    Steeper pitches complicate work, raising costs 20-50% due to scaffolding and safety harnesses. Workers prefer 6:12 or less for walkability.

    Maintenance like cleaning gutters is riskier on high pitches, but debris sheds easier, reducing frequency. Low pitches demand frequent inspections for standing water.

    Climate-Specific Choices

    In monsoon-heavy 4:12-6:12 pitches excel for rapid runoff. Snowy favors 6:12+; arid deserts tolerate 2:12 with good membranes.

    Windy coastal areas opt for 3:12-5:12 to minimize uplift. Always consult local codes—e.g., many require 3:12 minimum for shingles.

    Measuring Roof Pitch

    Use a level and tape: From eaves, measure 12 inches horizontally, then vertical rise to the roofline. Apps or architects provide precise calculations for quotes.

    Knowing your pitch aids repairs; e.g., 5:12 needs specific shingle types.

    Read more: Asphalt Shingle Roof Replacement Services in TN | Benefits of Drone Roof Inspection 

    Common Mistakes to Avoid

    Undersizing pitch for climate leads to leaks; oversizing hikes material needs by 30%. Ignoring pitch during reroofing mismatches old/new sections.

    Skipping professional assessment risks code violations or insurance hikes.

    Roof pitch fundamentally shapes a home’s resilience against weather, efficiency, and style. Selecting the right one—typically 4:12-6:12 for balanced performance—ensures decades of protection while optimizing costs and comfort.

    Opt for expert consultation – TCS Roofing Company to align pitch with your location’s demands

  • How Do You Determine Your Roof Pitch?

    How Do You Determine Your Roof Pitch?

    Roof pitch measures a roof’s steepness, crucial for material selection, construction, and maintenance. Learning to determine it empowers homeowners and DIYers to assess repairs or upgrades accurately.

    What Is Roof Pitch?

    Roof pitch describes the vertical rise of a roof over a horizontal run, typically expressed as a ratio like 6:12, meaning 6 inches of rise per 12 inches of run. This slant affects water runoff, snow shedding, and aesthetics—steeper pitches (over 9:12) suit snowy areas, while low pitches (under 4:12) work in dry climates. Expressed alternatively in degrees or percentages, pitch guides shingle types and truss design; for instance, US homes average 20°-30°.

    Why Measure Roof Pitch?

    Accurate pitch calculation ensures proper roofing materials, as low-slope roofs need underlayment to prevent leaks, unlike steep ones. It informs replacement costs—steeper roofs demand more labor—and complies with building codes varying by region. Homeowners use it for solar panel efficiency or insurance quotes, while builders balance pitch for style and practicality, targeting 4:12 to 6:12 as ideal.

    Tools You’ll Need

    Gather a 12-inch level, tape measure, ladder with safety gear, and optionally a framing square or smartphone app like “Pitch Gauge.” For attic access, add a notepad and flashlight. These basics suffice for most homes; pros might use laser levels for precision on large roofs.

    Method 1: From the Roof Surface

    Climb safely to the roof using a sturdy ladder and harness. Place the level horizontally on the roof, ensuring it’s plumb.

    ​Hold the level flat against the roofing material. Measure vertically from the roof to the level’s 12-inch mark—this distance is your rise. A 5-inch rise yields a 5:12 pitch. Note: Account for slippery surfaces or snow by measuring multiple spots and averaging.

    Pitch NotationRise (inches per 12″ run)Angle (degrees)Best Uses
    03:123~14°Low-slope, modern homes ​
    06:126~27°Standard residential ​
    09:129~37°Snow-prone areas ​
    12:1212~45°Steep, traditional styles ​

    Method 2: From the Attic

    Access the attic for a safer, ground-level option without roof climbing. Locate a rafter and measure from its bottom edge upward to the roof sheathing—this is total rise.

    ​Measure the rafter’s horizontal length (run), typically half the building’s width from ridge to wall. Divide rise by run for the pitch ratio; for example, 8 feet rise over 16 feet run equals 6:12 after converting to inches (812 / 1612). Verify with a framing square: Align the 12-inch body mark horizontally and read rise on the tongue.

    Advanced Calculation: Degrees and Percent

    For degrees, use rise/run as tangent: Roof angle = arctan(rise ÷ run) * (180/π). A 6:12 pitch (0.5 tangent) is about 27°—input into a calculator or app. Percentage pitch is (rise/run)*100; a 6:12 equals 50% slope. Online tools like Omni Calculator automate this, inputting rise and run for instant results.

    Using a Framing Square

    Mark pitch on a framing square for rafter cuts. For 6:12, note 6 inches on the tongue (vertical) and 12 on the body (horizontal). Slide the square along the rafter until lines meet evenly—this confirms pitch and aids precise cuts. Ideal for new builds or repairs.

    Apps and Digital Tools

    Smartphone apps simplify measurement: Level the phone on the roof for instant digital readouts, or use AR tools for remote estimates. RoofSnap’s calculator inputs dimensions for pitch, area, and material needs. Free options abound, but calibrate against manual methods for accuracy.

    Read more: Top ten Roofing Company in Franklin | Benefits of Drone Roof Inspection

    ​Common Mistakes to Avoid Roof Pitch Measurements

    Measure on a clear day to dodge ice or wet surfaces skewing levels. Ignore eaves or fascia—focus on the roof plane itself. Averages hide hips or valleys; measure each plane separately for complex roofs. Double-check math: Misdividing rise by run leads to costly material errors.

    Pitch and Regional Factors

    In Tennessee, US, with its humid subtropical climate featuring hot summers, occasional snow, storms, and heavy rain, pitches around 20°-30° (4:12 to 6:12) are standard for residential roofs to ensure good drainage and heat dissipation without excessive height. Steeper pitches (7:12+) suit eastern mountainous areas like the Smokies for snow shedding; moderate slopes work well in Nashville’s urban heat or Chattanooga’s valleys. Codes, based on IRC, mandate minimums like 2:12 for asphalt shingles (with double underlayment up to 4:12) to prevent leaks, prioritizing ventilation against extreme temps up to 100°F+.

    Determining roof pitch demystifies home upkeep. Whether eyeing shingles or repairs, these steps deliver pro-level insights safely. Practice on sheds first for confidence.

  • How to Prevent Roof Leaks During the Rainy/Monsoon Season

    How to Prevent Roof Leaks During the Rainy/Monsoon Season

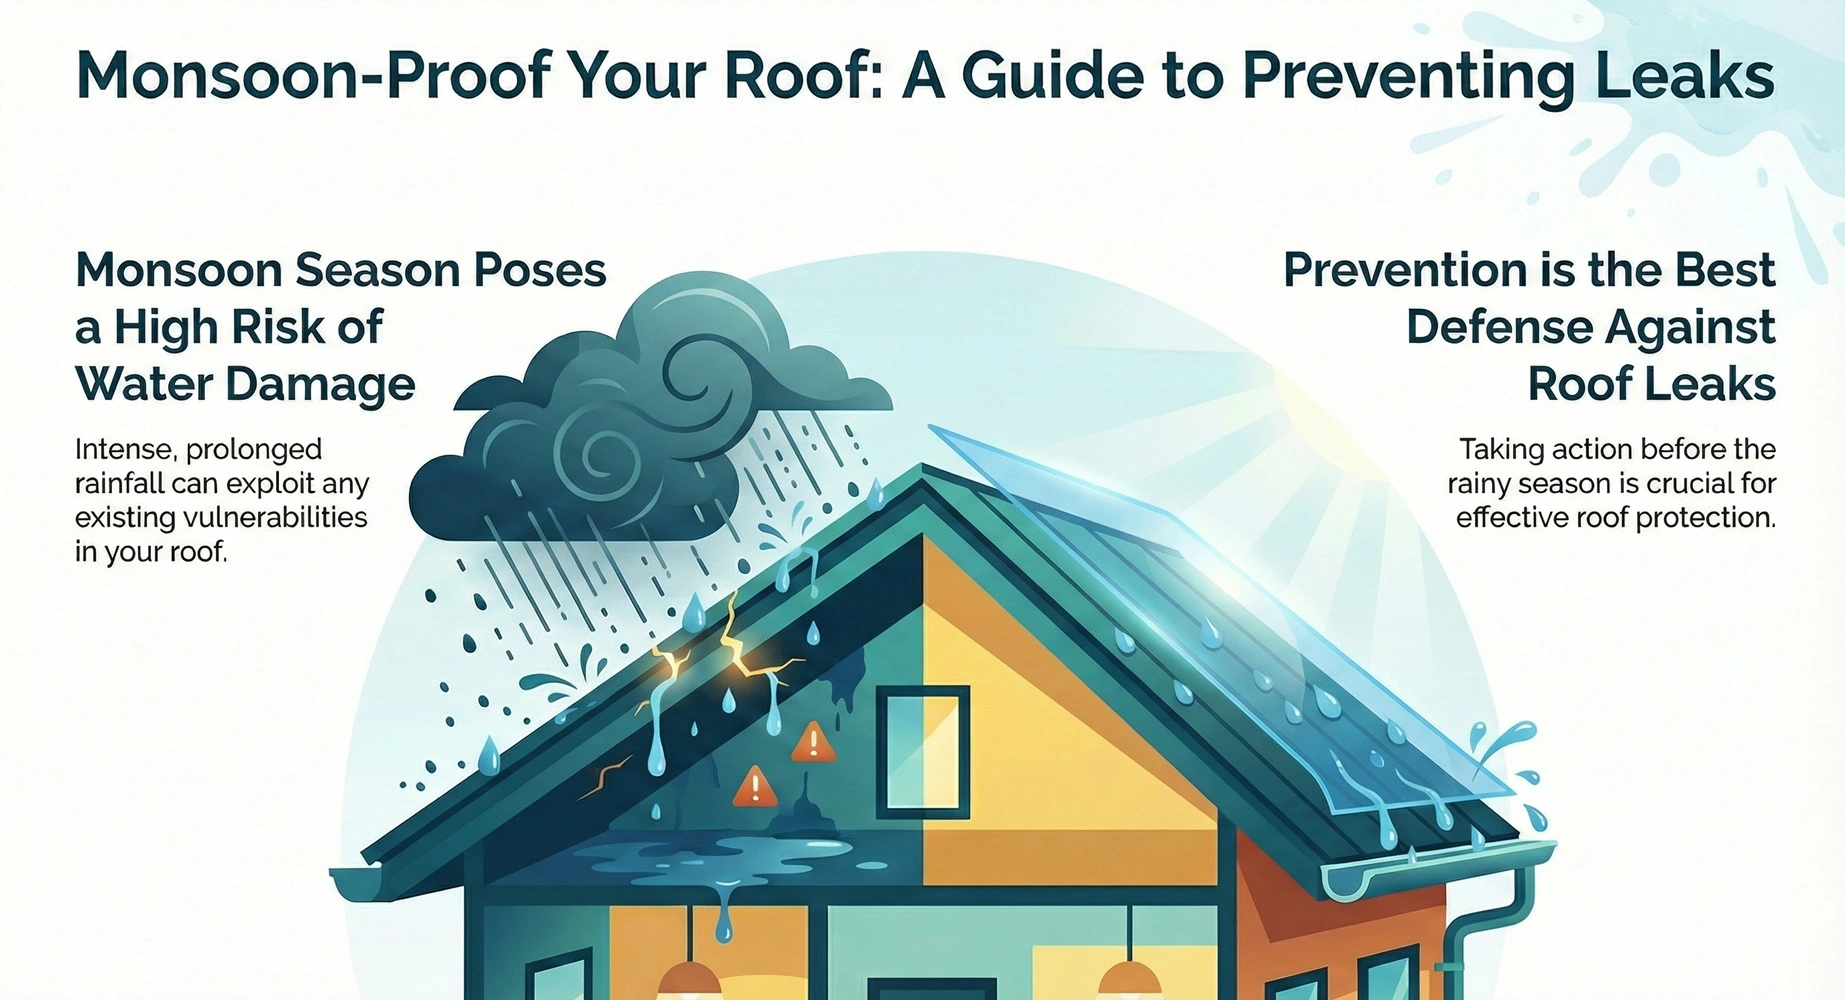
    Roof leaks during the rainy or monsoon season can cause significant damage to your home, leading to water stains, mold growth, and structural issues. Preventing roof leaks requires proactive maintenance and simple strategies tailored for heavy rainfall periods like India’s monsoons.

    Pre-Monsoon Roof Inspection

    Start your prevention efforts with a thorough inspection before the rains arrive. Climb up safely or use binoculars to check for cracked, curled, or missing shingles, as these create entry points for water. Look for rust on metal flashes around chimneys, blisters on flat roofs, and accumulated debris like leaves that trap moisture. Addressing these early prevents minor issues from escalating during downpours.

    Clean Gutters and Downspouts

    Clogged gutters are a primary cause of leaks, as backed-up water overflows and seeps under tiles or roofing material. Schedule a cleaning at least twice a year—once before monsoon and after major storms—to ensure free-flowing drainage. Inspect downspouts for blockages and extend them away from the foundation to avoid pooling at the base of your home, which can lead to foundation cracks over time.

    Seal Cracks and Joints

    Gaps in joints around chimneys, vents, valleys, and skylights allow rainwater to infiltrate. Apply high-quality roof sealant or silicone caulk to these areas after cleaning them dry and debris-free. For flat roofs common in India, use polyurethane liquid membranes or sheet waterproofing to form a seamless barrier that flexes with temperature changes without cracking. Reapply every 2-3 years for lasting protection.

    Trim Overhanging Branches

    Tree branches rubbing against your roof during winds loosen shingles and create openings for leaks. Trim branches at least 10 feet away from the roofline to minimize debris fall and storm damage. Remove deadwood and keep surrounding vegetation low to reduce leaf buildup, which exacerbates gutter clogs during monsoons.

    Apply Waterproof Coatings

    Coatings add an extra layer of defense against relentless monsoon rains. Opt for acrylic or polyurethane-based roof paints that penetrate and seal porous surfaces, preventing water absorption. These are especially effective on concrete terraces; apply two coats after surface prep for UV and water resistance, extending roof life by years.

    Improve Attic Ventilation

    Poor attic airflow traps humidity, weakening roof decking from the inside and promoting leaks. Install ridge vents, soffit vents, or powered attic fans to circulate air and reduce condensation buildup. In humid regions like Uttar Pradesh, this step is crucial during monsoons to prevent mold and rot without compromising insulation.

    Emergency Fixes for Sudden Leaks

    If rain starts before full prep, use tarps secured with concrete blocks or nails over damaged areas to divert water temporarily. Place roofing tar or peel-and-stick patches on small holes, and position buckets indoors while monitoring from attic access points. These buy time for professional repairs without letting water cause interior havoc.

    Watch Now: Insurance Claim for Roof Damage by Storm

    Professional Help and Long-Term Tips

    For roofs over 10 years old or complex issues like flashing replacement, hire certified roofers annually—spring, fall, and post-storm. In Kanpur’s climate, combine inspections with thermal imaging for hidden leaks undetectable by eye. Invest in durable materials like metal sheets or Onduline profiles for monsoon-prone areas, as they resist corrosion better than aging tiles.

    Prevention StepFrequencyKey Benefit
    Roof InspectionTwice yearly + post-stormSpots vulnerabilities early
    Gutter CleaningBefore/after monsoonPrevents overflow and seepage
    Sealing JointsEvery 2-3 yearsBlocks water at flashings and valleys
    Waterproof CoatingEvery 3-5 yearsSeals porous surfaces
    Branch TrimmingAnnuallyReduces debris and wind damage

    Regular adherence to these steps safeguards your home investment. Consistent care not only averts costly repairs but also enhances energy efficiency by minimizing moisture-related heat loss. Stay vigilant, and your roof will weather the monsoons reliably.

  • Top Benefits of Professional Roof Maintenance & Inspection

    Top Benefits of Professional Roof Maintenance & Inspection

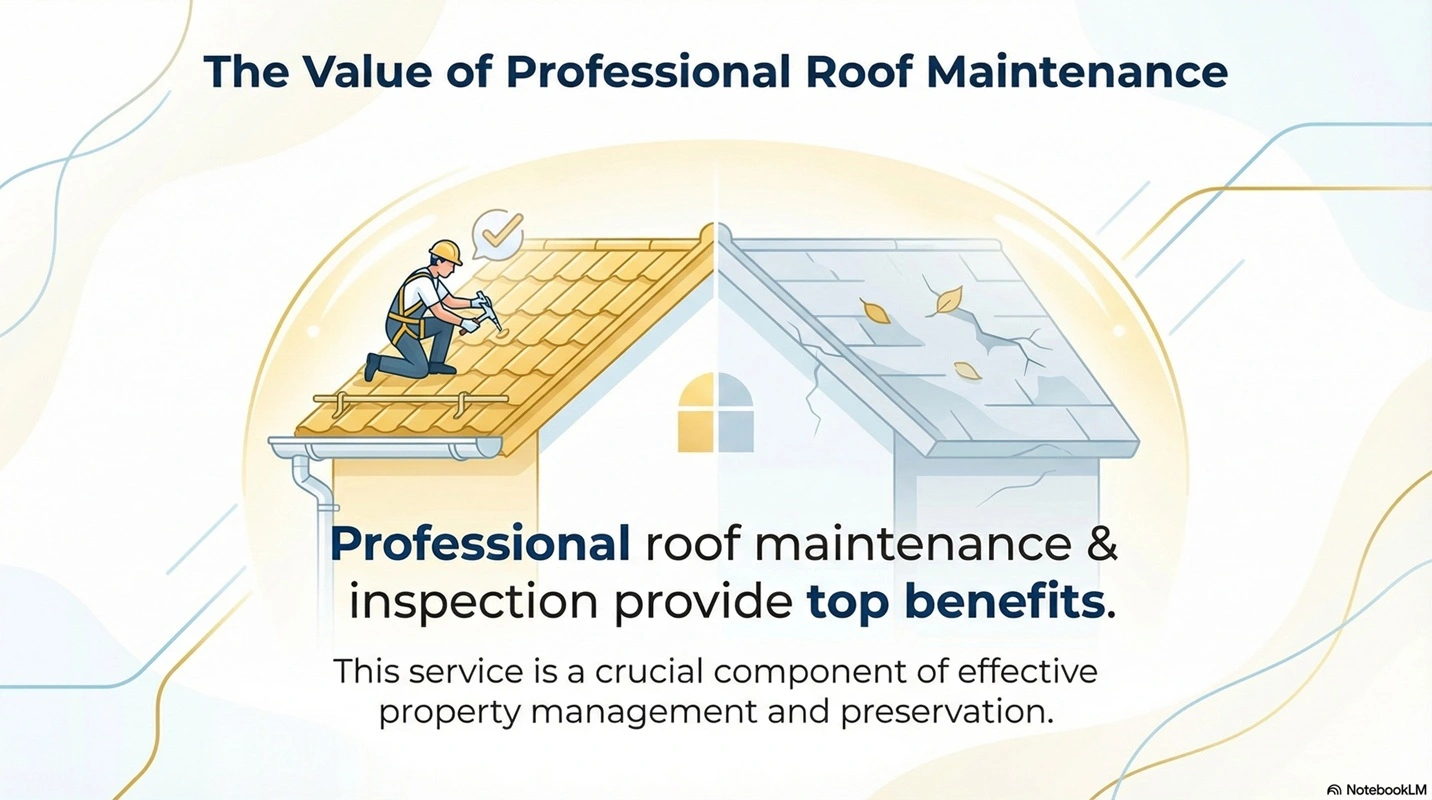
    Professional roof maintenance and roof inspections offer critical protection for homes and buildings by catching issues early and extending roof life. Homeowners gain peace of mind, cost savings, and safety through these services.

    Early Problem Detection

    Professionals spot minor issues like loose shingles, cracked flashing, or small leaks before they escalate into major damage. This prevents water intrusion that could lead to mold growth, rot, and structural weakening inside the home. Early fixes keep repair costs low and maintain the home’s integrity over time.

    Extended Roof Lifespan

    Regular inspections and upkeep can add years to a roof’s expected 20-30 year life by addressing wear from weather, debris, and aging materials. For instance, cleaning gutters and replacing damaged tiles stops progressive deterioration that shortens roof service. Well-maintained roofs perform better against storms and retain energy efficiency.

    Significant Cost Savings

    Addressing small problems now avoids expensive full replacements or emergency repairs later, often saving thousands of dollars. Professional services identify hidden damage that DIY checks miss, preventing secondary issues like interior water harm. Over time, this proactive approach boosts property value by ensuring the roof stays in top condition.

    Enhanced Safety and Health

    Inspections reduce risks from weakened structures or falling debris, keeping families safe during high winds or heavy rain. They also prevent mold and mildew from leaks, which pose respiratory health threats especially to vulnerable residents. Certified experts use proper equipment to inspect safely, avoiding homeowner injuries from steep roofs.

    Insurance and Warranty Compliance

    Many insurers require annual professional inspections to validate claims and maintain coverage, avoiding denied payouts after storms. These services document roof condition, supporting warranty claims on materials and workmanship from installers. Up-to-date records simplify financing or sales by proving the roof’s reliability.

    Improved Energy Efficiency

    Clean, intact roofs with proper ventilation minimize heat gain in summer and heat loss in winter, lowering utility bills. Maintenance like sealing gaps or recoating flat roofs enhances insulation without major overhauls. This contributes to a greener home footprint while adding long-term savings.

    Peace of Mind

    Knowing a certified pro has thoroughly checked the roof eliminates worry about unseen problems during severe weather. Detailed reports from inspections guide future planning, like timing for repairs or replacements. This confidence lets homeowners focus on enjoying their property rather than constant upkeep concerns.

    In summary, skipping professional roof maintenance risks accelerated wear, health issues, and financial strain, while regular service delivers reliability and value for any property owner. Schedule inspections twice yearly or after major events for optimal results.

    Watch Now: Benefits of Drone Roof Inspection

    TCS Roofing Company – Trusted Roofing Experts

    Don’t delay—protect your home today with TCS Roofing Company, Middle Tennessee’s trusted experts in professional roof maintenance and inspections. As your local Nashville roofing pros, we deliver rapid inspections to catch issues early, extend your roof’s life, and save you thousands on future repairs, all with honest pricing and top workmanship. Whether facing storm damage, leaks, or routine upkeep, our certified team offers free assessments, emergency tarping, and insurance claim support for seamless service.

    ​Visit TCS Roofer website to request a call back or schedule your inspection. Act before the next storm hits—spots fill fast in peak season! Call us and gain peace of mind with a thorough, no-obligation roof check from pros who prioritize your home’s safety.